System Architecture Progress Report
Chimdi Anude and Kene Chukwuma-Orakwe
March 26th, 2023
Hi everyone! My name is Chimdi Anude and I am a sophomore studying electrical and computer engineering. I'm on the system architecture team and I joined C2S2 last fall. Prior to joining the team, I had very little experience/background on it, especially since it is not something that can be taught in classes like the Analog, Digital and Software subteams. Since at the beginning of last semester, we did not have a campus partner yet, I wanted to be proactive and start looking for sensors we might need for the PCB. It was doing this research where I learned how to read datasheets and pay attention to the maximum amount of current/voltage for each integrated circuit. Since the goal is a low power chip, I didn't want sensors that negated that. In that case why have a low power chip at all, if it wasn't going to be uniform across the board. This low power mindset affected what components were implemented. Adafruit was an extremely useful tool. I was also taking ECE 2100 (Intro to Circuits) and ECE 2300 (Digital Logic) concurrently and it was so cool to apply what I was learning in lecture to my project. We finally decided on a color sensor, a microphone, a HTP (Humidity, Temperature, Pressure) sensor and an IMU. We put all these sensors on a PCB with its accompanying passives, peripherals, and modules. We call it the Sensor Shield. We fabbed our Sensor Shield at the end of the fall semester and received them a couple weeks ago. Since then, we have been doing a series of testing and validation to make sure that everything is working properly. As of right now, we have thoroughly tested the power stage, components, the voltage regulator and the color sensor. The plan is to check the other sensors in the upcoming weeks.
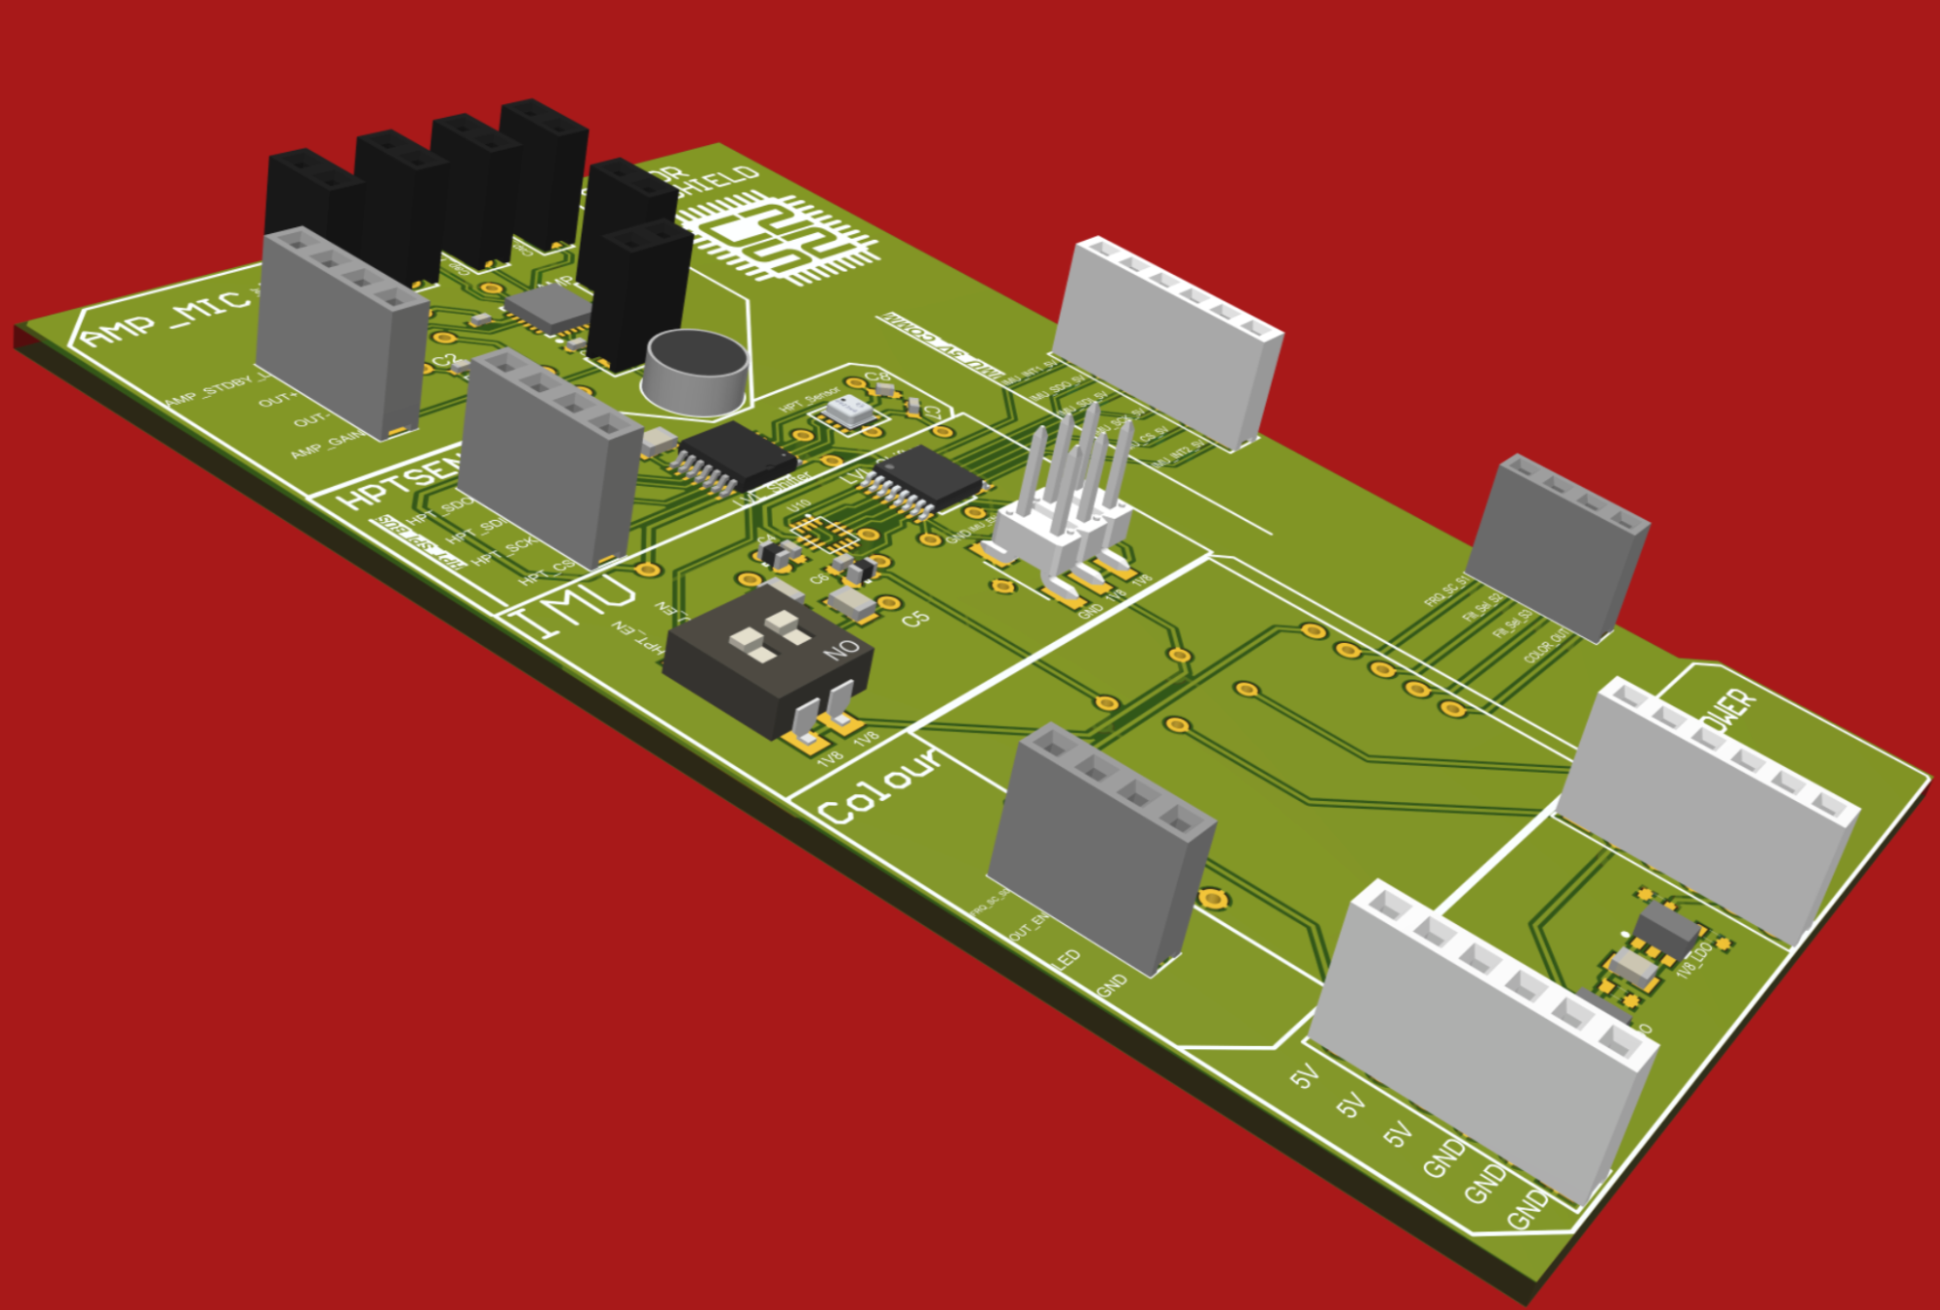
Sensor Shield PCB 3D Render
Towards the end of last semester and into this one, I have been getting more familiar with a PCB Design software called Altium. Last semester, I designed the input power stage of the input power of our microcontroller and now I am working on the PCB Board that will host the Caravel Chip from our Faculty Advisor's Batten's class: ECE 5745. The Caravel chip was not made by C2S2 however it is really similar to the chip the Digital and Analog subteams will tapeout so its good practice. It is a big and daunting task especially as I am not completely acquainted with the software. I have already spent a lot of time watching YouTube videos to understand even how to implement custom symbols.I had to implement custom symbols because the Caravel is a custom chip. Not only that but even deciphering the documentation of the chip has been a lot. I am taking ECE 3140 right now and a lot of it ties back to my current task. It's been a lot of trial and error but I have been enjoying it so far. Every semester, since joining this team I continue to learn more and grow. I can't wait to see what I do and learn next!
Hello! My name is Kene Chukwuma and I'm a freshman planning on majoring in Electrical and Computer Engineering. Being a part of the system architecture sub-team of the custom silicon systems project has been an incredibly valuable experience. Through my work on testing PCB and verification script automation, I have gained a deeper understanding of the design process and the importance of thorough testing and verification. One of the most important things I have learned is the importance of communication and collaboration within a project team.
Working with team members from different disciplines and backgrounds has allowed me to see the project from a variety of perspectives and gain new insights into the design process.
Additionally, regular team meetings and the bi-weekly check-ins have helped ensure that we are all on the same page and working towards the goals that we set out to achieve for the project team and for ourselves.
Another important lesson I have learned is the importance of paying attention to detail and thorough testing. The modules we have designed and implemented on the testing PCB must be thoroughly tested to ensure that they are functioning as intended and to catch any potential issues or errors early on. Similarly, the verification scripts we have written must be carefully crafted and tested to ensure that they are accurately measuring and analyzing the performance of the board and that the right metrics are being measured.
To do this, I worked with a teammate to write a verification script on Python to automate a Rigol Power Supply Unit to sweep through a set range of voltages, to set a Rigol Multimeter to measure the data, store it and then graph it. We did all this without manually adjusting the PSU or the Multimeter. Some of the code that was written can be seen below:
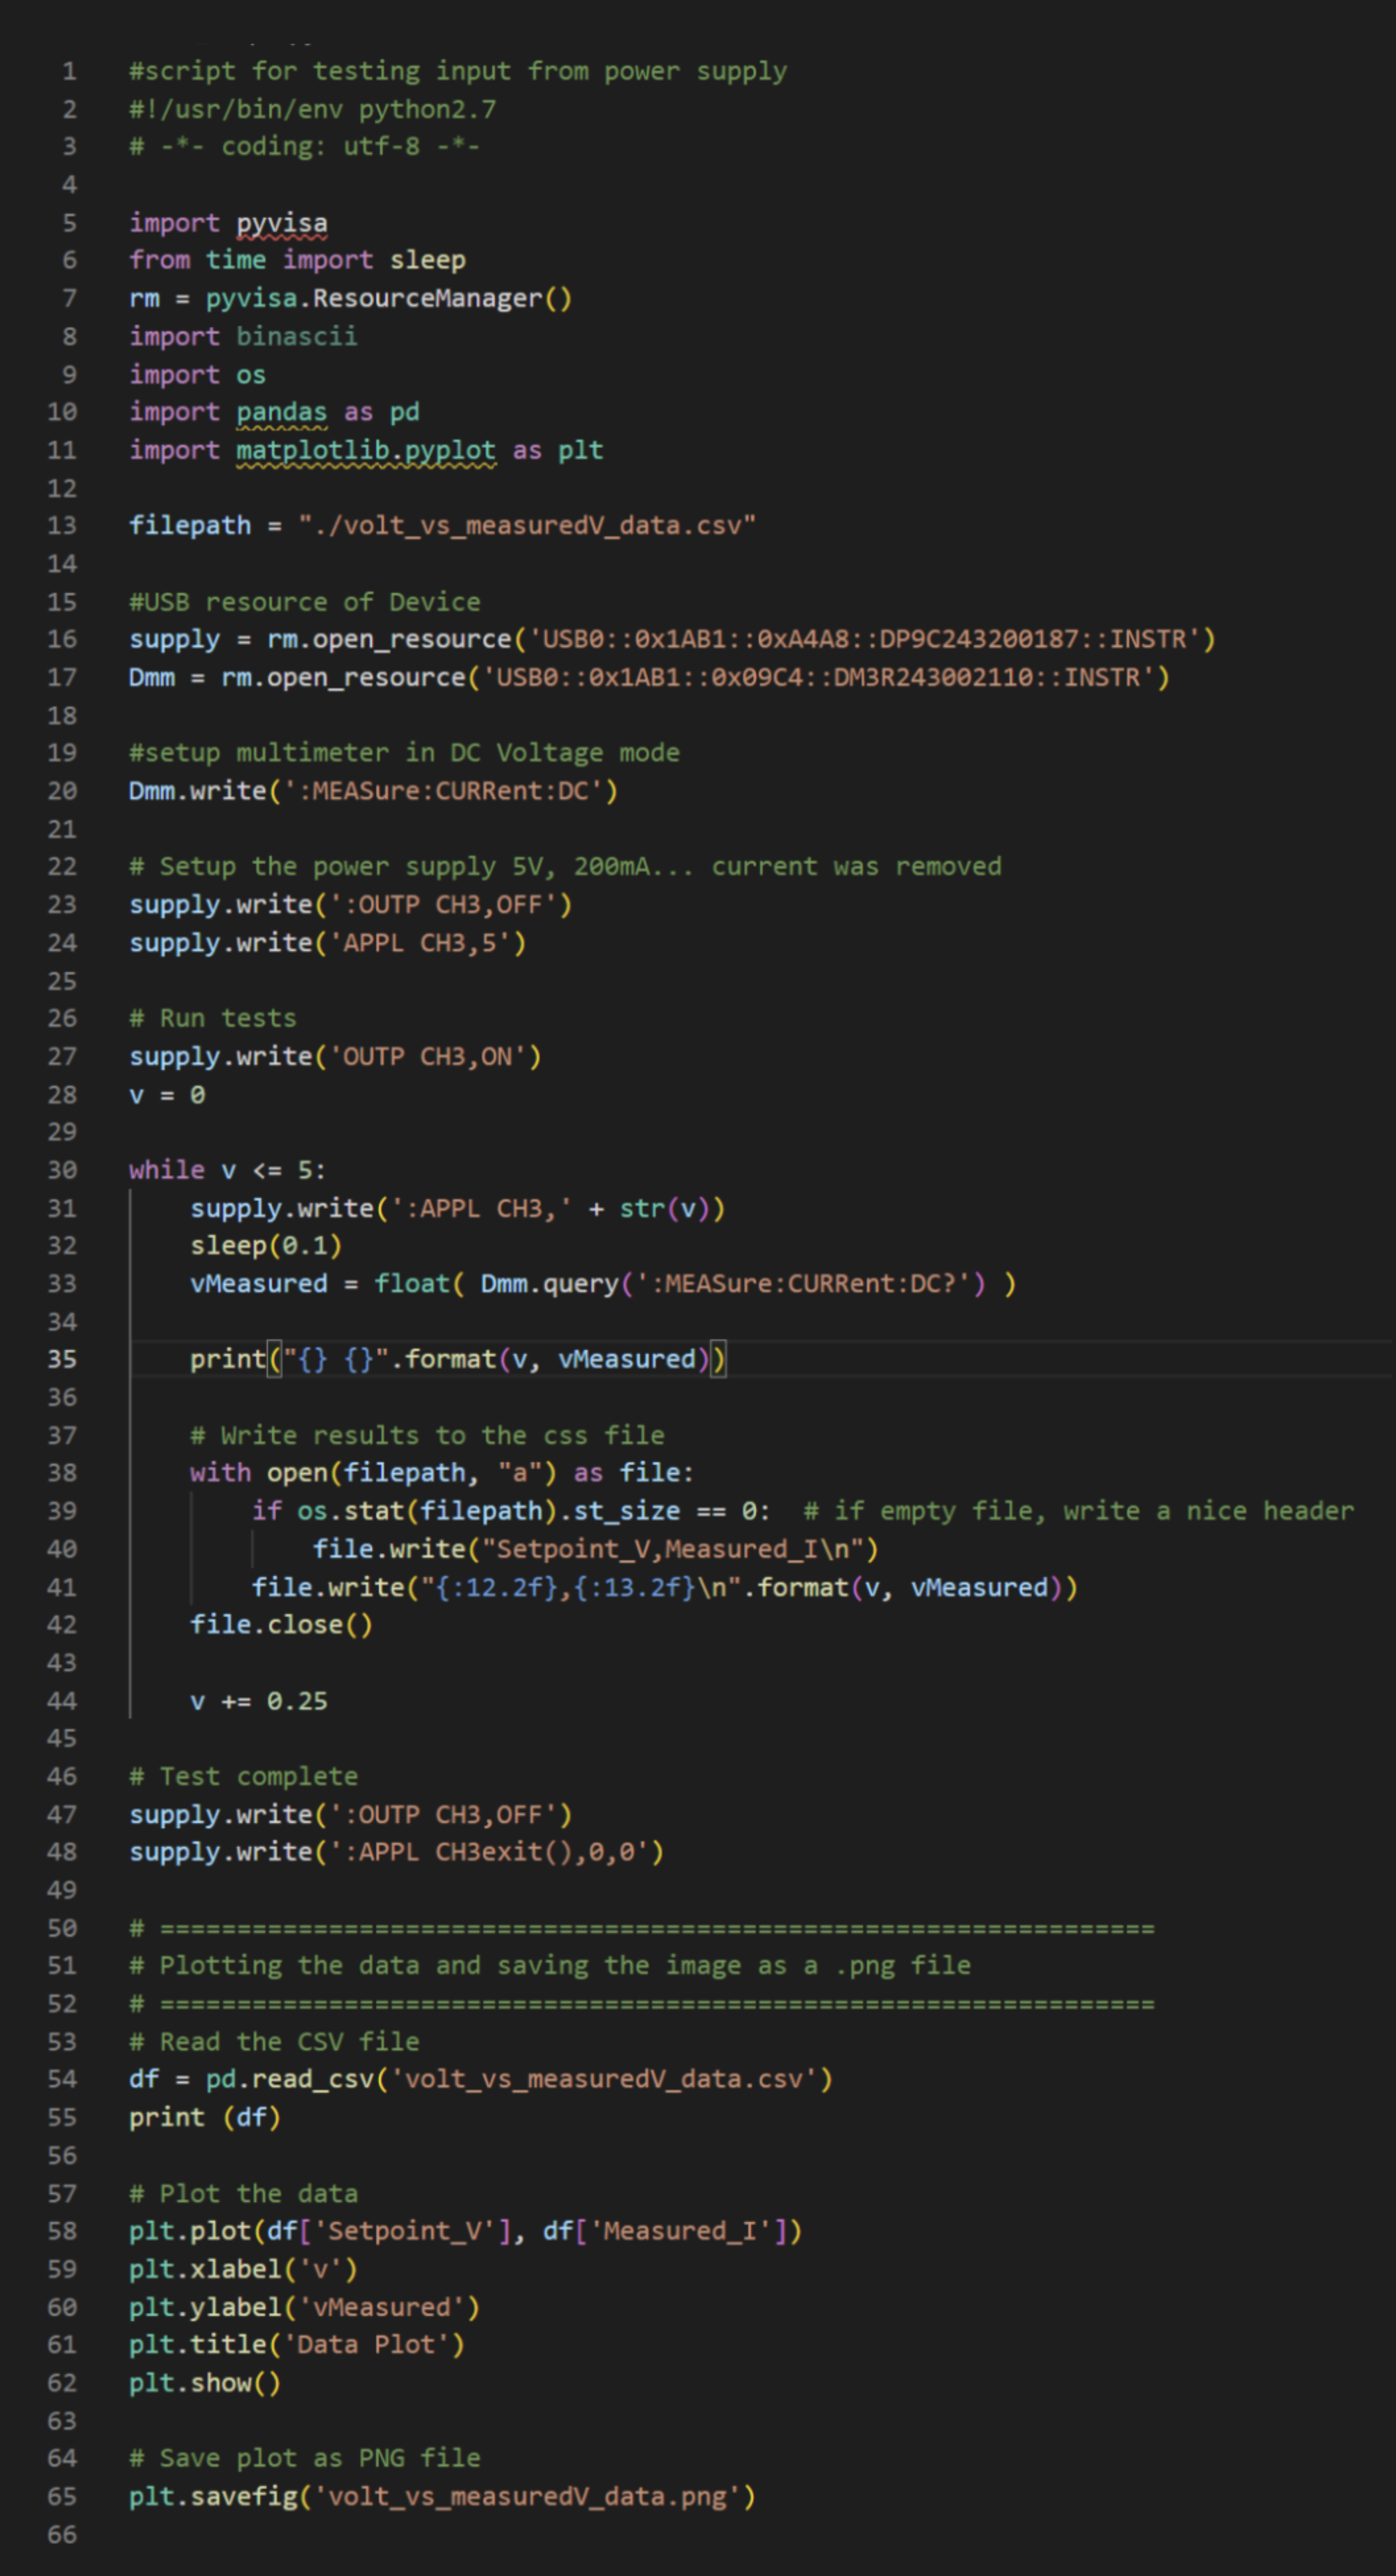
Voltage Sweep in Python
To issue these commands, I used the USB interface of the PSU and the Multimeter to connect the lab gears to my laptop. Running the script was like pushing a button and we got some of the data from measuring the voltage.
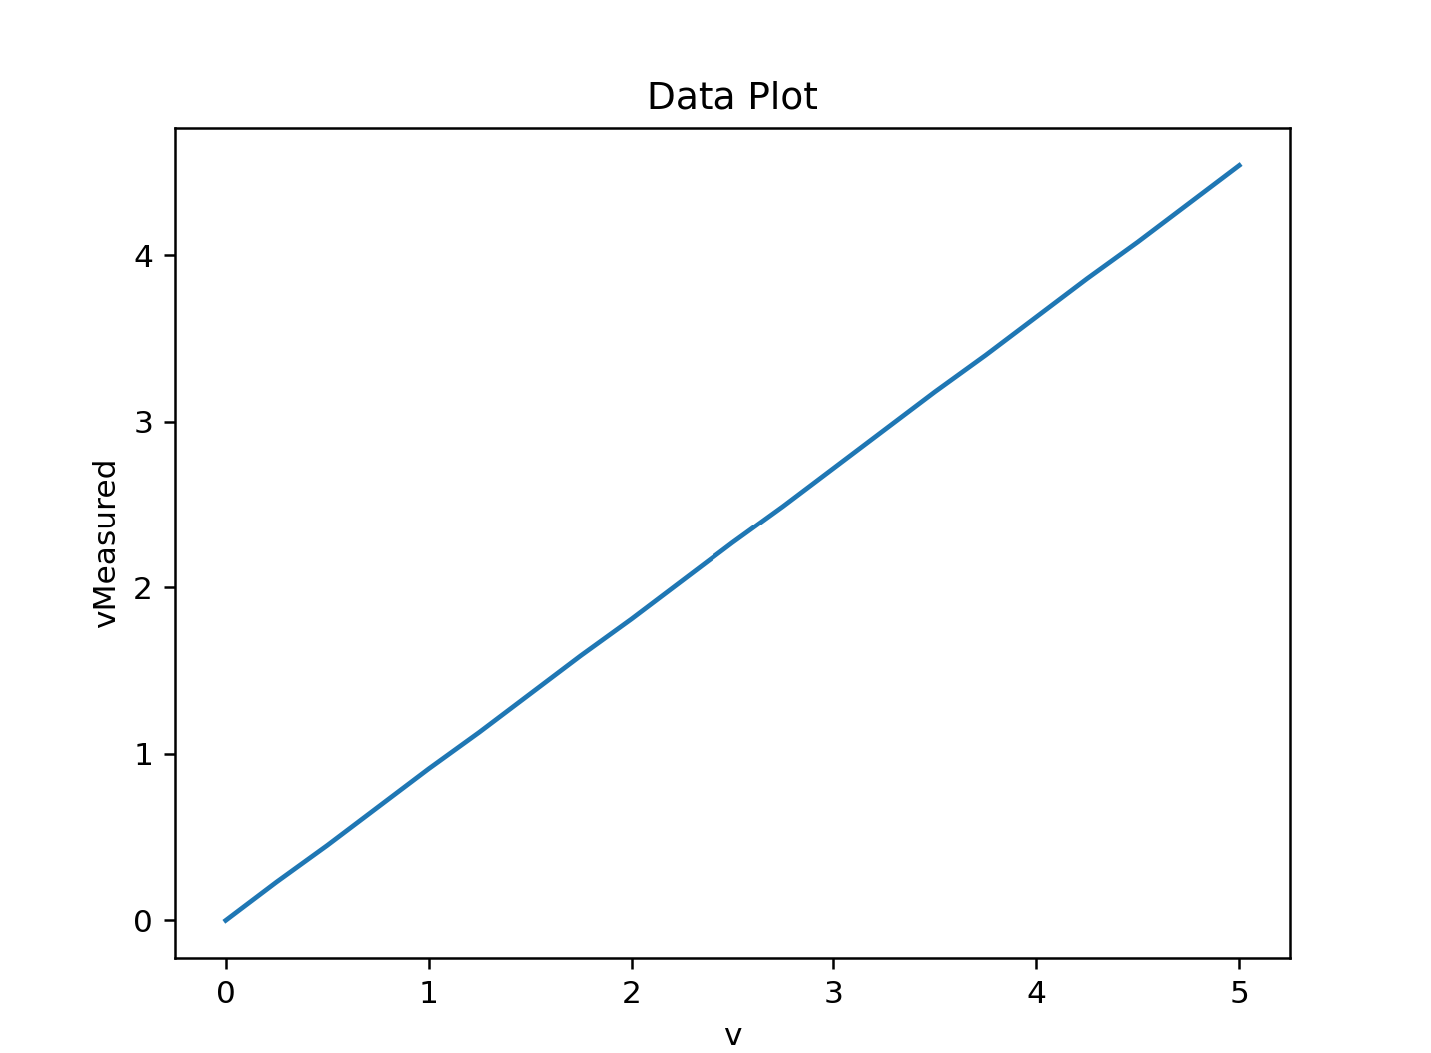
Test Data Graph
While we were successful in automating the Bench Supply to give an output of a different voltage for each iteration of the while loop we ran, we ran into the challenge of not being able to switch PSU from constant voltage mode to constant current mode.The issue was that we couldn't stop the PSU from supplying a fixed amount of current. The hope was that we could make the current more dynamic.
Finally, I have also learned the importance of taking a step back and looking at the bigger picture. It can be easy to get caught up in the details of a specific task or module, but it is important to remember how that task fits into the larger project and to ensure that it aligns with the overall goals and objectives. One problem we ran into and had to learn from was the issue of data accumulating into one file every time we ran the code to test its functionality. This leads to not only procuring inaccurate data but also creating a new file for the graph that portrayed the data each time. We then learned to include that into our code so that everything is fully automated.
Overall, my experience on the project team has taught me valuable lessons about teamwork, attention to detail, and the design process. One of the most important things I have learned so far is that things aren't always as hard as we make out to be in our heads; with determination and proper guidance, you can solve any feasible problem. I look forward to continuing to work on the project and further developing my skills as an engineer.